
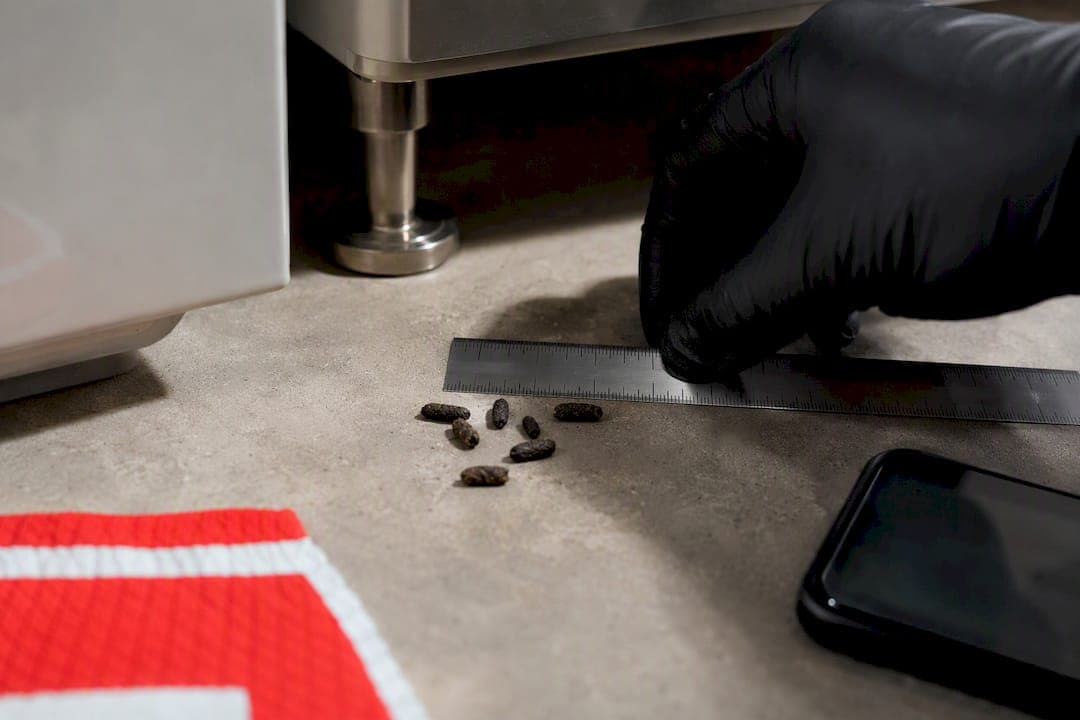
The fastest way to identify rodent droppings is measuring length and checking shape: pellets under 6 millimeters with pointed ends are mouse, while anything past 12 millimeters and capsule shaped points to a rat. Mouse droppings resemble a cut grain of rice; rat droppings look thicker, longer, and often blunt at both ends. Photograph the droppings next to a coin or ruler before you clean anything up, and resist the urge to sweep them away first.
TL;DR:
- Droppings under 6 millimeters with pointed ends indicate mice, while larger, capsule-shaped droppings over 12 millimeters point to Norway rats.
- Rechecking the same spot within 24 to 48 hours helps confirm if a rodent problem is active or resolved, based on new droppings.
- Proper identification requires photographing droppings next to a scale, noting moisture levels, and considering location patterns like baseboards or attics.
- Cleaning should involve disinfectant sprays, protective gear, and sealed waste disposal to prevent pathogen spread; professional help is advised for high-risk areas.
- Mistaking other animal droppings for rodents, such as cockroach frass or squirrel pellets, can lead to ineffective treatments and waste resources.
Table of Contents
- Quick Rodent Droppings Identification: Size, Shape, and Measurement
- Where Droppings Show Up and What the Pattern Means
- Ruling Out Cockroaches, Bats, Lizards, and Squirrels
- Fresh vs. Old Droppings: Reading the Timeline
- Cleaning Up Safely: The Health-First Protocol
- What to Do Next: Monitor, Trap, or Call a Pro
- How Bespoke-Enviro Services Confirms Species in the Field
- Why Getting the ID Right the First Time Matters
- Sources
Quick Rodent Droppings Identification: Size, Shape, and Measurement
Three numbers do most of the work in rodent droppings identification. Mouse droppings run 3 to 6 millimeters long with pointed, tapered tips. Roof rat droppings measure closer to 12 to 13 millimeters, still spindle shaped but noticeably longer and thicker. Norway rat droppings can reach 18 to 19 millimeters, and their shape shifts to a capsule with blunt, rounded ends instead of a point.
- Mouse: 3–6 mm, tapered ends, resembles a dark grain of rice
- Roof rat: 12–13 mm, spindle shaped, pointed but clearly larger than mouse pellets
- Norway rat: 18–19 mm, capsule shaped with blunt ends, the largest of the three
Pro Tip: Set a coin or a small ruler right next to the droppings before you shoot the photo, then take one close-up and one wider shot showing the exact spot. That single image often lets a technician confirm species without a home visit.
Measuring correctly matters more than most people assume. A dropping that looks "medium sized" to the naked eye can be off by several millimeters once you put a ruler next to it, and that gap is exactly what separates a mouse problem from a Norway rat problem. Photographing droppings with a coin or ruler for scale turns a phone snapshot into something close to a lab specimen. While you're at it, note roughly how many droppings you're seeing and whether they look moist or dry. Both details help later when you're deciding how urgent the problem is.
Where Droppings Show Up and What the Pattern Means
Location tells you almost as much as size. Rodents favor predictable spots: along baseboards, tucked into cabinet corners, behind the refrigerator or stove, scattered through attic insulation, and piled in garage corners near stored boxes.
- Check baseboards and wall junctions first. Rodents travel along edges, not open floor space, so droppings cluster where walls meet the floor.
- Inspect behind and under appliances. Warmth and food debris near refrigerators and stoves make these prime feeding stops.
- Look in attics and garages for piles rather than trails. A concentrated cluster usually marks a nest or harborage site, not just a travel route.
- Read the pattern. A thin line of droppings strung along a wall points to an active travel route; a dense pile in one spot suggests rodents are actually nesting nearby.
- Mark the spot and recheck in 24 to 48 hours. If new droppings appear after you clear the old ones, you're dealing with an active population, not leftover evidence from months ago.
That 24 to 48 hour recheck is the cheapest confirmation test available to a homeowner, and it costs nothing but a little patience.
Ruling Out Cockroaches, Bats, Lizards, and Squirrels
Plenty of things get mistaken for rodent droppings, and the mix up leads people toward the wrong product or the wrong pro entirely. A few visual cues sort this out fast.
- Cockroach frass looks like coarse pepper specks or small cylindrical pellets with visible longitudinal ridges, usually clustered in moist, dark areas like under sinks or behind refrigerators. Those ridges are the giveaway since rodent pellets are smooth and tapered, not grooved.
- Bat guano crumbles into a fine powder when pressed and often glints slightly from undigested insect fragments. It shows up in attics, soffits, and near roof entry points rather than along baseboards.
- Lizard and snake droppings carry a distinct white or chalky cap made of uric acid, sometimes with a cord-like dark section attached. True bird droppings show an even larger white, pasty portion.
- Squirrel droppings run larger than any rat pellet, closer to the size of an apple seed, and turn up almost exclusively in attics or soffit spaces where squirrels nest.
- Termite frass looks nothing like animal waste at all: uniform, hexagonal, sawdust colored pellets, often found in small piles beneath wood damage.
If you're already fairly confident it's a roach problem rather than rodents, our breakdown of cockroach infestation signs covers the next steps in more detail.
Fresh vs. Old Droppings: Reading the Timeline
Fresh droppings are dark, shiny, and slightly soft to the touch if you were to press them, which you shouldn't do bare handed. Old droppings turn dull, dry, and crumbly, sometimes graying at the edges. Indoors, that transition from fresh to dry typically takes somewhere around 48 to 72 hours depending on humidity and the surface underneath.
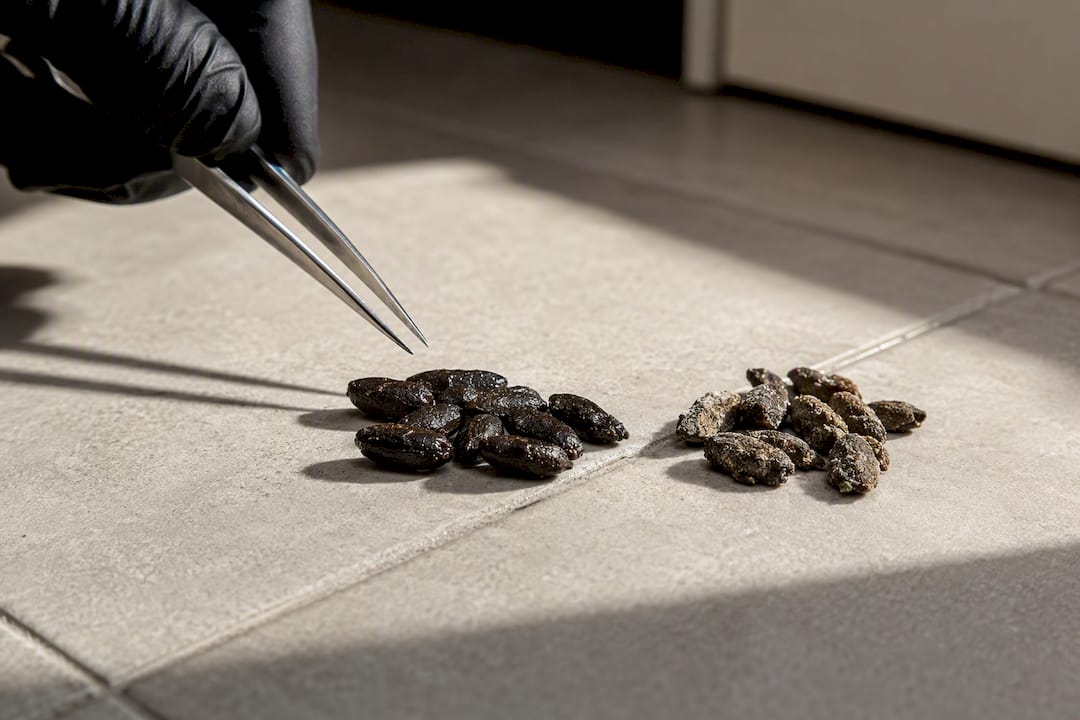
Shiny, dark droppings mean rodents were active in that spot recently, and the infestation likely needs faster escalation. Dry, crumbly ones might be leftovers from an issue that's already resolved, though they still require safe cleanup rather than casual sweeping. The mark and recheck method described earlier works here too: if fresh droppings keep appearing in a spot you've already cleared, the population is still active.
Cleaning Up Safely: The Health-First Protocol
Rodent droppings can carry pathogens that become airborne when disturbed, which is exactly why sweeping or vacuuming dry droppings is the wrong first move. Public-health cleanup guidance calls for a wet-clean method instead, and it's simple enough to follow without special equipment.
- Put on an N95 respirator, disposable gloves, and eye protection before you approach the area.
- Spray a disinfectant generously over the droppings and surrounding surface. Don't scrape or disturb them dry.
- Let the disinfectant soak for about five minutes so it has time to neutralize pathogens.
- Wipe everything up with disposable paper towels, working from the outside of the area inward.
- Double bag the waste and the towels, seal it, and dispose of it in an outdoor trash container.
- Wash your hands thoroughly with soap and water once gloves come off, even if nothing looked like it touched your skin directly.
Pro Tip: If you find droppings near an HVAC vent, in a food prep area, or alongside chewed insulation and nesting material, stop the DIY cleanup and call a professional instead. Those locations carry higher exposure risk, and a larger quantity of droppings usually means a larger population than a quick wipe down can handle.
Anyone who develops flu-like symptoms after exposure to rodent droppings should treat that seriously and mention the exposure to a doctor, since a handful of rodent-borne illnesses mimic ordinary viral symptoms early on.
What to Do Next: Monitor, Trap, or Call a Pro
Identification only matters if it changes what you do next. Here's the short version of that decision:
- Photograph every dropping site with a coin or ruler for scale, and keep a simple log of dates and locations.
- Mark cleared spots and recheck them in 24 to 48 hours to confirm whether droppings are reappearing.
- Set monitoring cards or traps sized to the species you identified. Mouse-sized snap traps do little against a Norway rat, and oversized rat traps waste effort on a mouse problem.
- Seal obvious gaps, secure food in hard containers, and clear clutter that gives rodents cover to nest in.
- Call a professional if fresh droppings keep showing up after these steps, if you find nesting material alongside the droppings, or if the location (attic insulation, wall voids, near plumbing) makes safe access difficult on your own.
For gaps specifically, sealing openings around a half inch to one centimeter wide closes off entry points that a full grown rat can otherwise squeeze through.
How Bespoke-Enviro Services Confirms Species in the Field
Droppings give a strong first read, but we never treat them as the whole picture. Trained technicians cross reference droppings with sebum trails along walls, fresh gnaw marks on wood or wiring, and the location of nesting material before confirming species and estimating how large the population actually is.
- We start with exclusion and sanitation. Sealing entry points and removing food sources solves a real share of cases before any product goes down.
- Targeted stationing and monitoring come next, placed based on the travel patterns your droppings and grease trails reveal.
- Chemical treatment is reserved for cases where exclusion and monitoring alone aren't cutting it, following integrated pest management principles rather than defaulting straight to poison.
- If you're preparing for a visit, bring your dated photos with scale, a rough count from your monitoring window, and the exact locations. It cuts inspection time significantly.
If droppings keep returning despite sealing gaps and setting traps, our general pest control service includes a full inspection that goes well beyond what a homeowner can check alone, and severe infestations in food storage or commercial spaces sometimes call for our fumigation service as the next step up.
Why Getting the ID Right the First Time Matters
We see the same mistake repeatedly: someone finds a few dark pellets, assumes "mouse," sets a snap trap, and wonders three weeks later why nothing's working. It was a Norway rat the whole time, and the trap was never built for it. Precise identification saves money and time, and it keeps the wrong chemicals or oversized traps out of a home where they're not needed. Photograph what you find, monitor for 48 hours, clean up safely, and bring in a professional the moment the picture gets murky. Guessing costs more than checking ever will.
— Bespoke-Enviro Services
This article is general information, not a substitute for advice from a qualified doctor. Consult a qualified healthcare professional about your own circumstances before acting on anything here.
Sources
- Rodent & Insect Feces Identification — Aaron J. Lenz
- What to Look for - Identifying Active Rodent Signs (ARS) — NEHA
- Identifying your pest with poop — Cornell IPM blog
- The droppings and frass identification checklist — NoToPests
- Cockroach poop vs mouse poop: how to identify which pest you have - Cockroach Care