
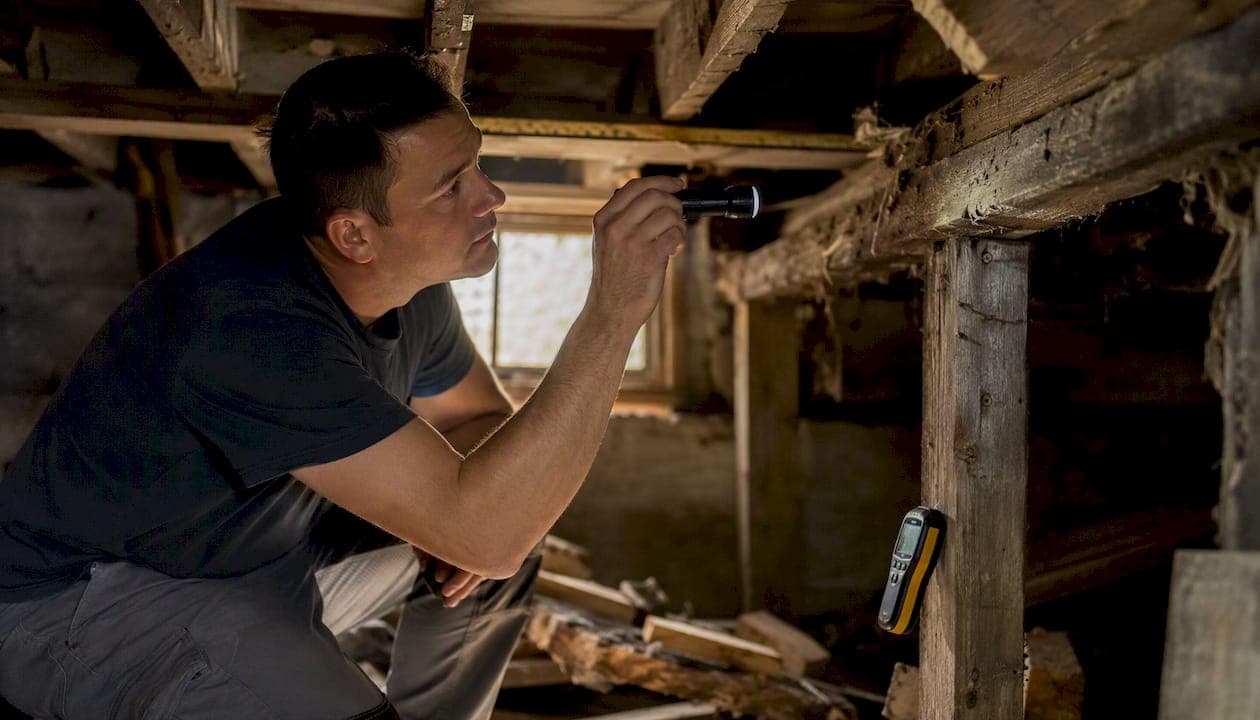
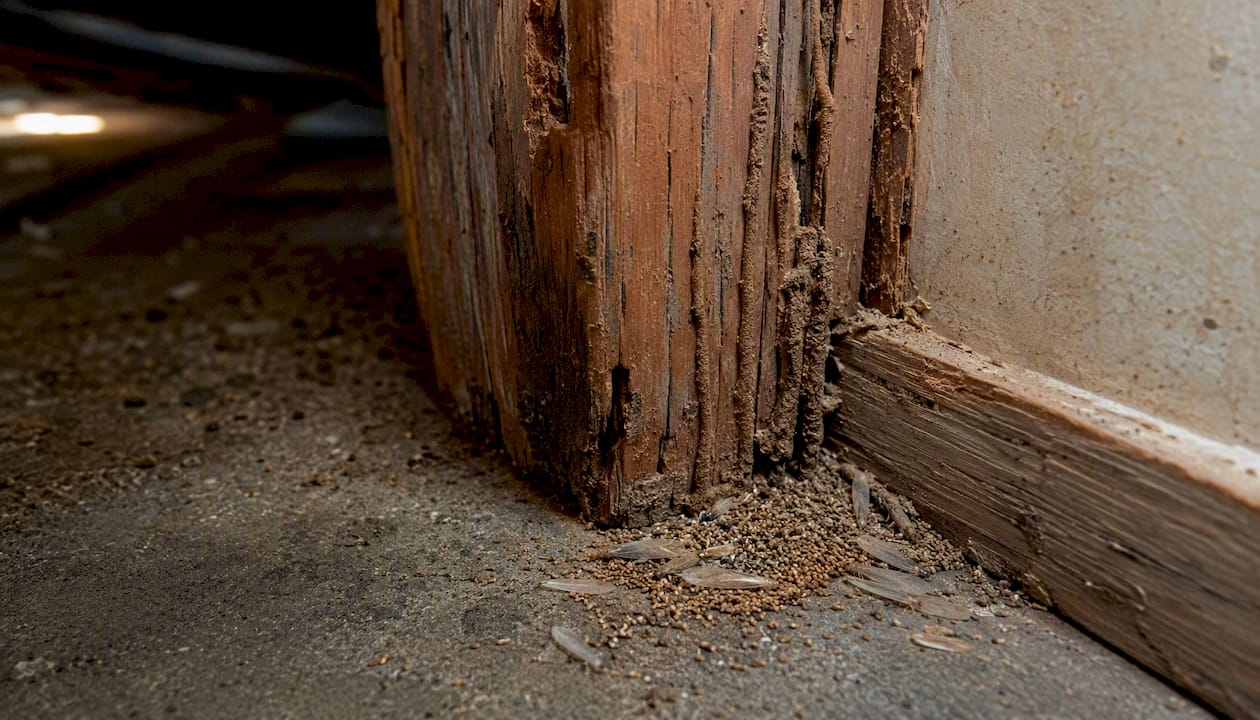
Start at the foundation and work outward: the five things to check first are mud tubes on foundation walls, wood-to-soil contact at sills or posts, blistered or bubbling paint on baseboards, frass (tiny pellet-like droppings) near walls or windowsills, and discarded wings clustered near light sources. According to exterminators who inspect routinely, those five signs cover the majority of early discoveries. If you find any of them, do three things immediately:
- Photograph it. Get close enough to fill the frame, then take a second shot from 12–18 inches back with a coin or pen in the frame for scale.
- Mark the location. Use painter's tape or a sticky note. Write the spot in plain language: "south exterior wall, 2 ft left of the hose bib."
- Call a licensed inspector if you see active mud tubes or live swarmers inside the house. Those two signs mean a colony is likely active right now.
Pro Tip: When photographing suspected termite damage, shoot from two angles: one tight close-up and one wide shot that shows the surrounding context. That combination is what speeds up a professional's diagnosis most.
Key Takeaways
A systematic termite inspection checklist, starting at the exterior perimeter and working inward through crawlspaces and attics, is the most reliable way to catch activity early and document findings a professional can act on.
| Point | Details |
|---|---|
| Start outside, work inward | Exterior perimeter and foundation walls reveal most early signs before interior symptoms appear. |
| Five priority signs | Mud tubes, wood-to-soil contact, blistered paint, frass, and discarded wings are the highest-value flags to find first. |
| Document precisely | Photograph from two angles with a scale object and note the exact location for every finding. |
| Moisture above ~20% is a risk factor | Use a moisture meter in crawlspaces and near plumbing; document any high readings with a photo. |
| Bespoke-enviro for professional assessment | Bespoke-enviro provides licensed inspections, written WDI-style reports, and non-toxic IPM treatment options. |
Table of Contents
- What a termite inspection actually is (and why it matters)
- How to prepare safely before you start
- Exterior checklist: walk the full perimeter first
- Interior checklist: room-by-room inspection points
- Foundation, crawlspace, and attic checks
- How to probe and test suspect wood safely
- Common termite signs and how to read them
- When to stop the DIY check and call a licensed inspector
- How often to inspect and what it typically costs
- Printable termite inspection checklist
- Detection tools professionals use beyond a flashlight
- A professional's perspective on what homeowners get wrong
- Bespoke-enviro's termite inspection and treatment services
- Sources
What a termite inspection actually is (and why it matters)
A termite inspection is a visual and tool-assisted evaluation of all accessible areas of a property for signs of termite activity and conditions that invite it. Inspectors check what they can see and reach; they do not open walls or remove finished surfaces during a standard visit. Findings are typically documented in a Wood Destroying Insect (WDI) report, the format most lenders and real-estate attorneys recognize for closings.
The stakes are real. Termite damage can compromise floor joists, sill plates, and structural framing before a homeowner notices anything visible. Repair costs for significant structural damage run into the thousands, and most standard homeowner's insurance policies exclude termite damage entirely. For buyers, a WDI report is often a lender requirement, and an undisclosed infestation can become a post-closing legal dispute. Regular inspections at least once a year are the standard professional recommendation, with more frequent checks advised for high-risk properties.
How to prepare safely before you start
Gather these tools before you walk the property:
- Flashlight or headlamp (hands-free is better in crawlspaces)
- Flathead screwdriver or awl for probing suspect wood
- Rubber mallet for tapping
- Moisture meter (optional but useful near plumbing and crawlspace sills)
- Phone or camera for photo documentation
- Painter's tape or sticky flags to mark locations
- Clipboard, notepad, or phone notes app
For crawlspaces and attics, add an N95 respirator, work gloves, and knee pads. Those spaces concentrate dust, mold spores, and insulation fibers that irritate airways fast. DIY inspection guides consistently flag PPE as the step homeowners skip most often.
Before you walk, clear a 12-inch perimeter around the foundation of stored items, move furniture slightly away from exterior walls inside, and confirm attic and crawlspace hatches are accessible. Do not apply any insecticide or attempt repairs before a professional assessment. Treatments applied before an inspection can mask evidence, void future warranties, and complicate any real-estate disclosure.
Pro Tip: Gather any past inspection reports, pest control invoices, or repair receipts before the inspector arrives. A prior inspection record lets the pro compare current findings against a baseline and flag new activity faster.
Exterior checklist: walk the full perimeter first
Inspectors start outside because most early evidence appears on the exterior before interior symptoms develop, and the perimeter reveals both active signs and the conditions that attract termites in the first place. A systematic exterior-first approach is standard professional practice.
Foundation and slab:
- Scan the entire foundation wall at soil level for pencil-thin mud tubes
- Check expansion joints, weep holes, and slab edges for mud patches or soil seams
- Look at stucco-to-soil transitions and any point where two different materials meet
- Inspect plumbing and electrical penetrations through the slab or foundation wall
Wood-to-soil contact:
- Check door frames, window frames, and trim boards that sit close to or touch grade
- Look at deck posts, stair stringers, and pergola footings for direct soil contact
- Inspect fence posts and gate frames along the property line
Landscape and yard risks:
- Mulch piled against the foundation (pull it back 6 inches and look underneath)
- Stacked firewood stored against or near the house
- Tree stumps, buried fence posts, or railroad ties within 10 feet of the structure
- Planter boxes or raised garden beds touching exterior walls
Exterior structures:
- Decks and pergolas: check every post base and the ledger board where the deck attaches to the house
- Detached sheds: check sill plates and any wood touching concrete or soil
- Exterior stairs: look at the bottom riser and any wood-to-concrete contact
Interior checklist: room-by-room inspection points
Work from the ground floor outward toward the exterior walls, then move to secondary spaces. The goal is to find the subtle evidence that a homeowner might dismiss as normal wear.
Ground-floor rooms:
- Run a flashlight along all baseboards, looking for blistered paint, pinholes, or frass trails
- Tap baseboards and door frames with a screwdriver handle; a hollow thud instead of a solid knock is a flag
- Check window sills and the bottom corners of door frames, especially on exterior-facing walls
- Look for discarded wings near windows, sliding doors, and light fixtures
Kitchen and bathrooms:
- Open under-sink cabinets and inspect the cabinet floor and back wall for frass or mud
- Check where plumbing pipes penetrate the cabinet floor or wall
- Look at the toe-kick boards on cabinets along exterior walls
Garage and attached structures:
- Inspect the door frame between the garage and the living space
- Check the ceiling and wall junction above the garage door header
- Look at any wood shelving or stored lumber on the garage floor
Attics, closets, and storage areas:
- Shine a light along exposed rafters and ridge boards for mud tubes or frass
- Check stored paper, cardboard boxes, and old lumber — termites feed on cellulose in all forms
- Look at the top plates of walls where they meet the roof framing
Foundation, crawlspace, and attic checks
These three zones are where termites do the most damage before anyone notices. They are also the most physically demanding parts of a home termite inspection, so take your time and document everything.
Crawlspace priorities:
- Sill plates (the wood sitting directly on the foundation): probe these first; they are the most common damage point
- Rim joists and floor joists: look for mud tubes running up from the foundation wall to the framing
- Subfloor panels: check for soft spots, staining, or frass on the upper surface of the joists
- Plumbing penetrations: any pipe that passes through wood creates a moisture-rich entry point
Foundation and slab specifics:
- Expansion joints are a common entry route; look for mud packed into the joint
- Stucco-to-soil contact is a high-risk zone that is easy to overlook
- Electrical conduit penetrations through the slab are another common path
Attic checks:
- Scan rafters and trusses for mud tubes, which can appear high on walls or near the ridge
- Roof leaks create moisture that makes attic framing attractive; note any water staining
- Check the top of interior partition walls where they meet the roof structure
A basic pin-type moisture meter costs under $30 at most hardware stores and gives you a reading in seconds. Document any high readings with the meter's display in the photo frame. The EPA's termite guidance specifically flags moisture control as one of the most effective prevention measures homeowners can take.
Moisture callout: Wood moisture readings above ~20% are a documented risk factor. Note the exact location and reading, and photograph the meter display in context.
How to probe and test suspect wood safely
The tap-and-probe technique is the core DIY skill for a home termite inspection. Done carefully, it reveals damage without causing harm to sound wood.
- Tap first. Use the handle of a screwdriver or a rubber mallet. Strike the wood firmly but not hard. Sound wood produces a dense, solid knock. Termite-damaged wood sounds hollow, papery, or produces a dull thud.
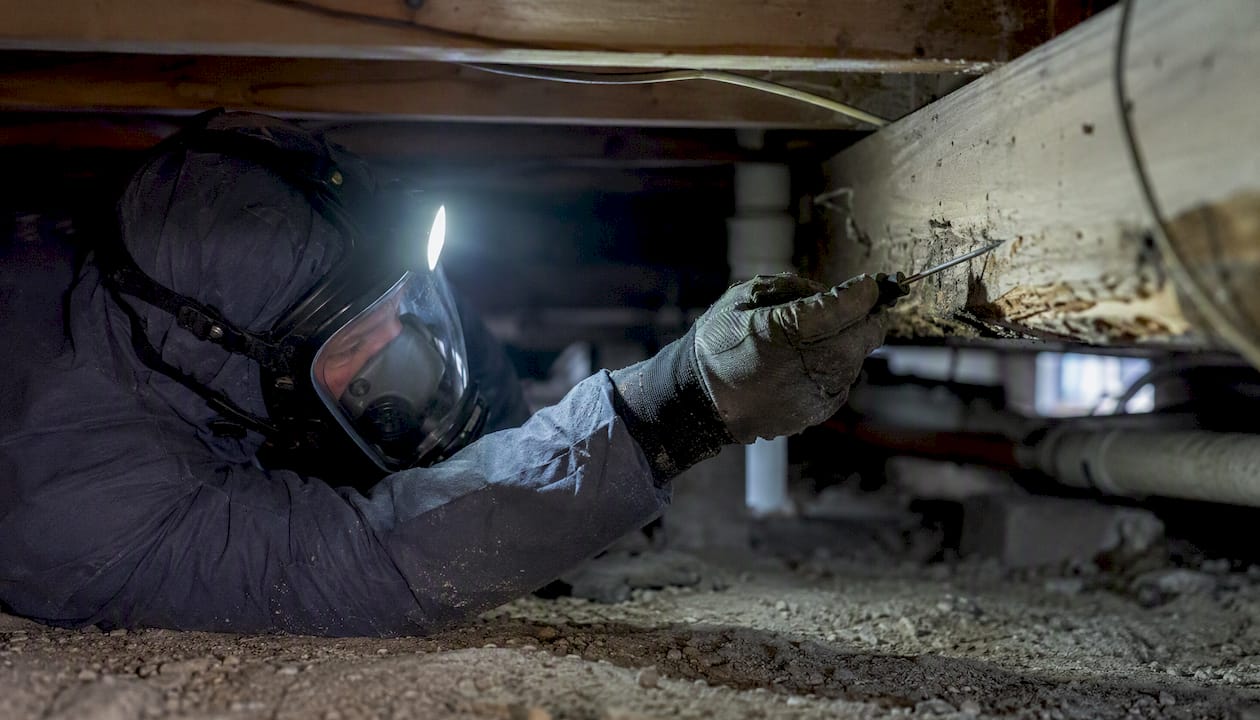
- Probe at 45°. If tapping suggests damage, press the tip of a screwdriver or awl into the wood at roughly a 45-degree angle with moderate hand pressure only. Sound wood resists. Damaged wood gives way easily, and the tip may punch through into a gallery (a hollow tunnel).
- Read the result. If the probe sinks in with little resistance and you see powdery frass or a hollow cavity, that is a positive finding. Note it immediately.
- Stop at load-bearing members. Never aggressively probe structural posts, main beams, or any member you suspect is carrying significant load. If a structural member sounds hollow, stop and call a professional. ReportWalk's field guide notes that distinguishing active from prior activity requires precise documentation of location and probe results, not deeper physical investigation.
- Document each finding. Photograph from two angles. Include a scale object. Write the exact location: "north crawlspace, rim joist, 3 ft east of the access hatch."
Pro Tip: Never remove finished wall surfaces, trim, or flooring to investigate further. Once you have a positive probe result, the job shifts to a licensed inspector. Removing material can expose you to liability and complicate a real-estate transaction.
Safety note: in tight spaces, watch for electrical wiring and plumbing. Wear gloves and your N95 before entering any crawlspace or attic. If you feel any structural instability underfoot, back out.
Common termite signs and how to read them
Knowing what you are looking at changes the next call you make.
- Mud tubes: Pencil-thin tunnels of soil and saliva built by subterranean termites to travel between the ground and their food source. To test activity, break a short section (about an inch) and photograph it. Return in 5–7 days. If the tube has been repaired, the colony is active. If it stays broken, the tube may be abandoned.
- Frass: Drywood termites push their droppings out through small kick-out holes. Drywood frass looks like tiny, six-sided pellets, often the color of the wood being consumed. It is frequently mistaken for sawdust, but sawdust is irregular and fibrous; frass is uniform and granular.
- Discarded wings: Swarmers (reproductive termites) shed their wings after finding a new nesting site. A pile of equal-length wings near a window or light fixture, especially in spring, means a swarm happened recently. That is an immediate referral sign.
- Hollow-sounding wood and blistered paint: Termites consume wood from the inside out, leaving a thin shell. The paint above an active gallery often blisters or bubbles because the wood beneath has been hollowed. Tapping produces the hollow sound described above.
- Pinholes in drywall or wood: Small, round exit holes are where drywood termites push out frass. They are easy to miss on painted surfaces.
Close-up photos of each sign, paired with a wider context shot, give a professional inspector enough to make a preliminary assessment before they arrive. SafetyCulture's termite inspection checklist recommends geotagged photos and scheduled follow-up documentation as the most reliable way to track changes over time.
When to stop the DIY check and call a licensed inspector
Some findings require a professional, not a second look with a flashlight.
Call immediately if you find:
- Active mud tubes (repaired within a week of breaking)
- Live swarmers inside the house
- Structural members (posts, beams, sill plates) that probe easily or feel spongy
- Visible extensive damage covering more than a small, localized area
- Any finding in a load-bearing member
What a professional inspection includes: A licensed inspector will evaluate the full interior and exterior, enter the crawlspace, take moisture readings, and produce a written report. For ambiguous findings, they may use thermal imaging cameras, borescopes, or targeted probing in specific zones. Standard inspections cover visible, accessible areas only; additional testing is a separate scope item.
Trust signals to verify before hiring:
- State pest control license (verify with your state's department of agriculture or licensing board)
- General liability and workers' compensation insurance
- Written WDI-style report with findings, activity status, and treatment options
- Clear warranty or service guarantee terms
- Scope-of-work documentation before any treatment begins
Ask for a sample report before booking. Ask whether they provide pre-purchase WDI letters for real-estate closings, and confirm the timeline from inspection to written report delivery.
How often to inspect and what it typically costs
Frequency: Annual inspections are the baseline for most U.S. homes. Properties in high-risk regions (the Southeast, Gulf Coast, Hawaii, and parts of California), homes with previous infestations, or properties that have had recent grading or drainage changes around the foundation warrant inspections every 6–12 months.
Time: A standard single-family home inspection typically takes around an hour or more, depending on property size and access. Homes with large crawlspaces, multiple structures, or complex access points take longer. Follow-up testing (thermal imaging, borescope) adds time and cost.
Cost: A visual termite inspection for a standard single-family home generally costs a modest fee, which varies depending on region, property size, and access difficulty. Some pest control companies offer free inspections as part of a treatment quote. Always get a written estimate before work begins, and confirm whether the inspection fee applies toward treatment if you proceed.
For buyers: Confirm your lender's and purchase contract's specific WDI report requirements with your real-estate attorney or agent. Timing requirements vary by loan type and state.
Printable termite inspection checklist
Print this or copy it into your phone notes. Check each item, note the status, and attach photos.
Attach your photos to each row using a shared folder or a notes app that supports image attachments. A digital checklist with photo capture makes it easier to share findings with a professional before the inspection appointment.
Detection tools professionals use beyond a flashlight
A visual inspection with basic hand tools covers most accessible evidence. When findings are ambiguous or zones are inaccessible, professionals escalate to specialized equipment.
- Moisture meters: Pin-type meters measure wood moisture content at the surface. Non-invasive models use radio frequency to read deeper without penetrating the wood. Both help locate moisture-damaged zones that termites favor.
- Sounding tools: A rubber mallet or specialized acoustic device amplifies the hollow sound of termite galleries. Useful on large floor areas where hand-tapping would take too long.
- Thermal imaging cameras: Detect temperature differentials caused by termite activity, moisture intrusion, or hollow galleries behind finished surfaces. Most useful in walls and ceilings where visual access is limited.
- Borescopes: A small camera on a flexible cable inserted through a small drilled hole. Lets an inspector see inside a wall cavity without opening the surface. Used when thermal imaging suggests activity but cannot confirm it.
These tools are warranted when evidence is present but inconclusive, when a real-estate transaction requires a higher confidence level, or when zones are physically inaccessible. Standard inspections do not include invasive probing; when evidence is ambiguous, inspectors escalate to these methods rather than guessing.
A professional's perspective on what homeowners get wrong
Most homeowners who attempt a DIY check focus almost entirely on the interior. They tap a few baseboards, look under the sink, and call it done. The exterior perimeter, the crawlspace sill plates, and the landscape conditions around the foundation are where the real story usually starts, and those are the zones that get skipped.
The other consistent gap is documentation. Finding a mud tube matters far less if you cannot tell the inspector where it was, how large it was, and whether it looked fresh or dry. A photo with a coin for scale and a written note ("east foundation wall, 18 inches left of the downspout, approximately 6 inches long") turns a vague concern into a specific finding a professional can act on.
The checklist in this article reflects the same sequence a trained inspector follows: exterior first, then interior, then the below-grade and above-ceiling zones. The tools are simple. The discipline is in being systematic and writing things down. At Bespoke-enviro, our inspectors use an IPM-grounded approach that goes beyond visual checks to address the conditions that make a property vulnerable in the first place, not just the evidence of current activity.
Bespoke-enviro's termite inspection and treatment services

Completing a DIY walk-around is a smart first step, but a licensed professional inspection is what gives you a defensible, documented finding for a real-estate transaction, an insurance claim, or a treatment decision. Bespoke-enviro brings over 30 years of pest management experience and an IPM-based approach that identifies not just active termites but the moisture, soil-contact, and structural conditions that sustain them. Treatments use non-toxic, eco-friendly methods designed to be safe for people and pets while delivering lasting results. Whether you need a pre-purchase inspection, an annual check, or a full treatment plan, the team provides a written report with clear findings and treatment options. Request your inspection at Bespoke-enviro and get a written scope of work before any treatment begins.
Sources
These resources support the guidance in this article and are worth bookmarking for deeper reference:
- Termites: How to identify and control them | US EPA
- Free Termite Inspection Checklist | PDF | SafetyCulture
- 5 Things Exterminators Check During Termite Inspections | HowStuffWorks
- Termite Inspection: Field Guide for Inspectors | ReportWalk Blog
- What Happens During A Termite Inspection? A Room-by-Room Walkthrough | TermiteHQ
For transaction-specific questions (WDI report timing, lender requirements, disclosure obligations), consult your state's department of agriculture, a licensed pest inspector, or your real-estate attorney. Regulatory requirements vary by state and loan type.