
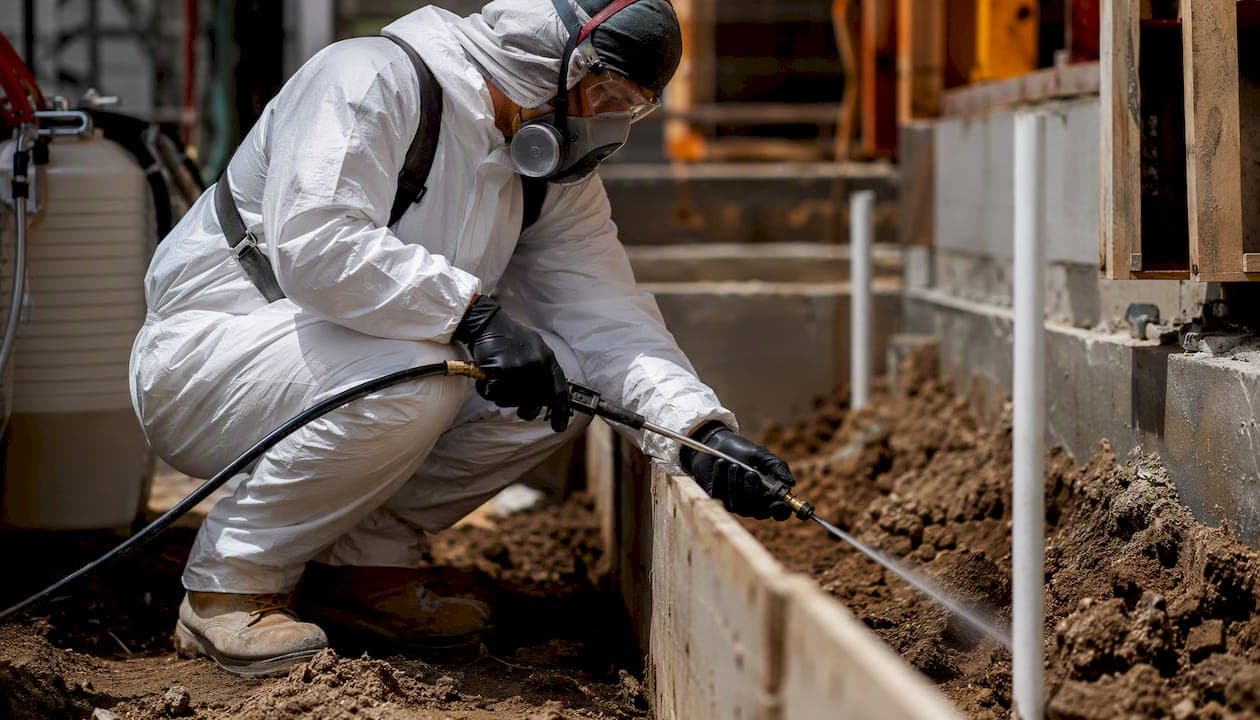
A pre-construction termite treatment (also called a pretreat) is a continuous chemical or physical barrier applied to soil and around foundation penetrations after final grading is complete but before the vapor barrier and concrete slab are installed. Schedule a licensed applicator for the same day as final grade approval, require a written scope listing the product name and EPA registration number, confirm label-compliant application rates, and insist on a posted treatment sticker and signed service record before the pour proceeds.
Three things to require before any concrete is poured:
- Product name, EPA registration number, and gallons applied, documented in writing
- Written scope specifying full versus partial treatment and every area covered
- A treatment record sticker posted on the structure and a signed New Construction Service Record
Miss the pre-slab window and you are looking at slab drilling, injection, and costs that dwarf the original pretreat.
Key Takeaways
Pre-construction termite treatment is most effective when applied at the correct label rates for your fill type and foundation, documented with a signed service record, and verified on-site before the slab is poured.
| Point | Details |
|---|---|
| Time the treatment correctly | Apply after final grading and before the vapor barrier; disrupting this sequence breaks barrier continuity. |
| Match rates to fill type | Follow the product label rates appropriate to your fill type, which vary by soil condition and fill material. |
| Document everything | Require product name, EPA number, gallons applied, and a signed service record before concrete is poured. |
| Verify penetrations on video | Rodding at utility penetrations is the most commonly missed step; a time-stamped video is the only proof. |
| Bespoke-Enviro Services | Provides licensed, IPM-based pretreat applications with full documentation for new construction projects. |
Table of Contents
- What is a pre-construction termite treatment and why does new construction need it?
- What are the main pre-construction treatment methods?
- How does application differ by foundation type?
- What construction practices must accompany any pretreat?
- How do you verify pretreat quality and meet regulatory requirements?
- How long does a pre-construction treatment last, and what monitoring follows?
- What does a pre-construction termite treatment typically cost?
- On-site QA checklist before the slab is poured
- Is pre-construction termite treatment legally required?
- How to choose a pretreat applicator: questions and red flags
- What builders get wrong about pretreats (and how to fix it)
- Bespoke-Enviro Services: expert termite protection for new construction
- Authoritative resources to consult
- Sources
What is a pre-construction termite treatment and why does new construction need it?
A pretreat creates a continuous barrier between the soil and the structure at the only moment when every potential entry point is fully accessible: after the site is graded and compacted but before concrete is poured. Once the slab is down, subterranean termites can exploit any gap, crack, or utility penetration that was left untreated. Retrofitting that protection later means drilling through finished concrete and injecting termiticide blind, which is both expensive and less reliable than a properly applied pre-pour barrier.
Subterranean termites are responsible for the vast majority of termite damage to structures in the United States, and they forage through soil, entering buildings at the foundation. A pretreat works by establishing both a horizontal barrier under the slab and vertical barriers along foundation walls, cutting off those foraging routes before the building is enclosed.
Why timing is everything: The sequence is non-negotiable. Final site cleaning and debris removal → final grading and compaction → termiticide application → vapor barrier placement → concrete pour. Disrupting that order, even by a single day of heavy rain or additional grading work after treatment, can break barrier continuity and require reapplication.
Many lenders and mortgage programs add financial weight to this timing. HUD requires builders using FHA or VA financing to provide a Subterranean Termite Protection Builder's Guarantee and a New Construction Subterranean Termite Service Record, both of which document treatment type, product, EPA registration, and total gallons applied. A missed or poorly documented pretreat can stall a mortgage closing.
Why pretreats lower long-term costs:
- Preventive soil treatment costs a fraction of post-construction remediation, which often requires slab drilling, localized excavation, and multiple pretreatment visits
- Physical and chemical barriers established before the pour remain largely inaccessible to termites for years, whereas post-construction treatments must be renewed more frequently
- Documented pretreats support warranty claims and satisfy lender requirements, reducing legal exposure for builders
What are the main pre-construction treatment methods?
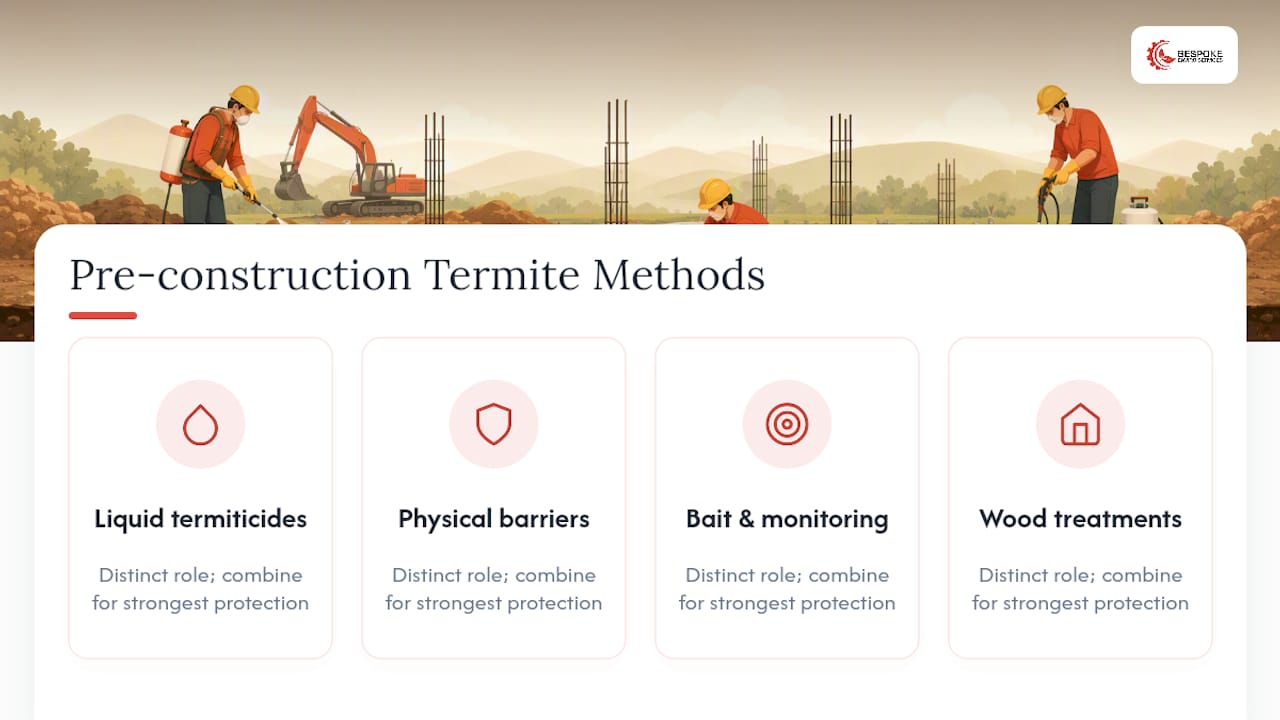
The EPA recognizes four broad categories for termite management in new construction: liquid soil-applied termiticides, physical barriers, bait and monitoring systems, and wood treatments. Each has a distinct role, and the strongest protection comes from combining them.
Liquid soil-applied termiticides
This is the workhorse of new construction termite prevention. A licensed applicator uses a 100-gallon tank and specialized spray equipment to apply a diluted termiticide solution to soil under the slab footprint and along foundation walls. Label-aligned rates run approximately 1 gallon per 10 square feet for standard soil fill and 1.5 gallons per 10 square feet for washed stone or coarse fill, which is less absorbent and requires a higher volume to achieve uniform coverage.
Active ingredients in currently registered products include imidacloprid, fipronil, bifenthrin, and chlorantraniliprole, among others. Some work as repellents, others as non-repellent transfer agents that termites carry back to the colony. The label specifies which approach applies and how to apply it correctly. DIY application is not realistic here: the equipment requirements alone (100-gallon tanks, calibrated spray rods) put this firmly in the professional category.
Strengths: Proven track record, widely available, label-defined rates give clear compliance benchmarks. Limitations: Barrier can be disrupted by post-treatment soil disturbance, plumbing repairs, or landscaping changes.
Physical barriers
Particle barriers (graded basalt or granite chips of a specific size range), stainless steel mesh, and termite-resistant sheeting are installed at slab penetrations and perimeters where liquid treatment alone may be difficult to apply uniformly. Physical barrier materials are particularly useful at pipe penetrations and critical slab details where drilling and rodding are impractical.
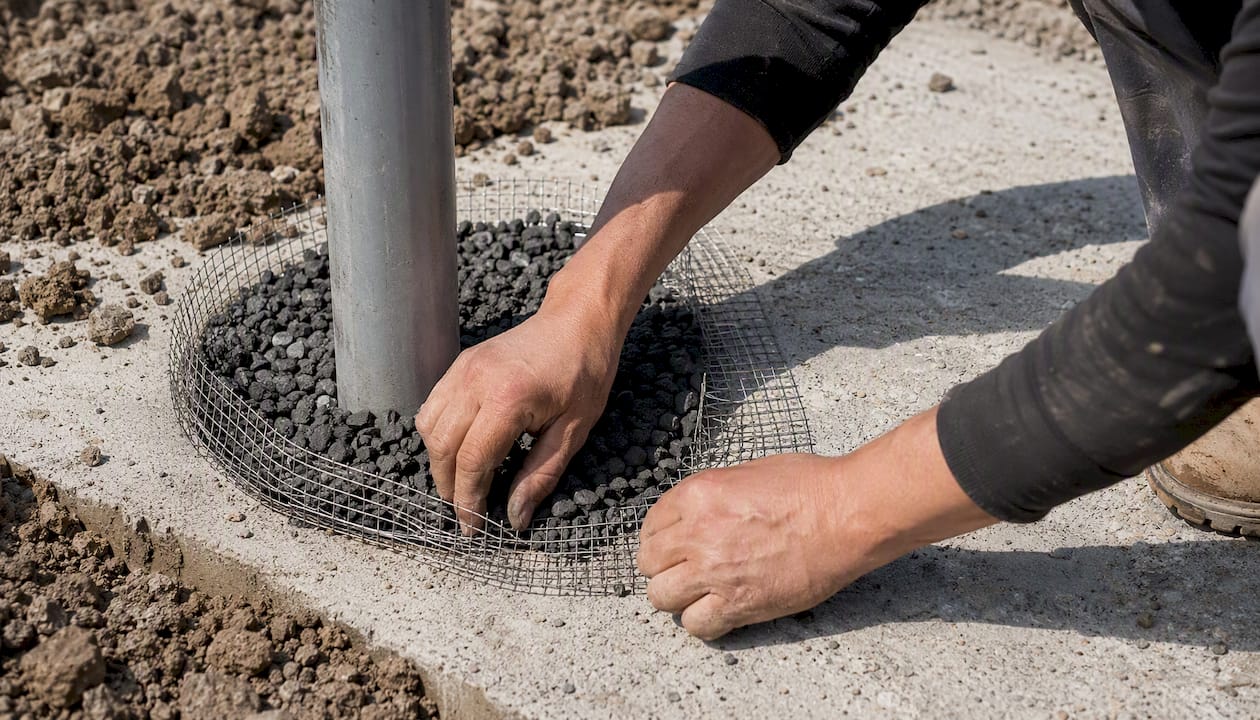
Strengths: No chemical degradation over time; effective at penetrations where liquid coverage is hardest to verify. Limitations: Installation is detail-intensive; gaps in mesh or particle layers defeat the purpose entirely.
Bait and monitoring systems
Bait stations installed in the soil around the perimeter intercept foraging termites before they reach the structure. In a pre-construction context, stations are typically set during or just after construction and serve as an ongoing monitoring tool rather than a primary barrier. They are most useful as a supplement in high-pressure zones or where soil conditions limit liquid termiticide effectiveness.
Strengths: Ongoing monitoring capability; useful where liquid treatments face restrictions (near wells, cisterns, or water features). Limitations: Not a substitute for a pre-pour soil treatment; slower-acting than a continuous chemical barrier.
Wood treatments: borates and pressure-treated framing
Borate-based treatments applied to framing lumber, sill plates, and subfloor sheathing add a second line of defense if termites breach the soil barrier. Pressure-treated lumber rated for ground contact is standard for any wood-to-soil interface. Neither replaces a soil treatment, but both materially reduce the risk of structural damage if a barrier is ever compromised.
Pro Tip: In high-termite-pressure regions (the Southeast, Gulf Coast, Hawaii, and parts of California), combining a liquid soil barrier with borate-treated framing and perimeter bait stations is the most defensible integrated strategy. Ask your applicator which combination your soil type and foundation design call for.
How does application differ by foundation type?
A continuous termiticide barrier must be established along all foundation elements, and the specific steps vary significantly by foundation type. What works for a slab-on-grade does not translate directly to a crawlspace or a basement with deep footings.
Slab-on-grade
This is the most common foundation type in new residential construction and the one where pre-pour timing is most critical. The applicator treats the entire soil fill area under the slab footprint at the label rate (approximately 1 gallon per 10 sq ft for standard fill; 1.5 gallons per 10 sq ft for washed stone). Special attention goes to bath traps, plumbing penetrations, and any conduit that passes through the slab, because these are the gaps termites exploit most reliably after construction.
On washed stone: When coarse aggregate is used as fill under the slab, the label typically requires the higher 1.5 gallon per 10 sq ft rate because the open structure of the stone reduces absorption and termiticide distribution. Confirm the applicator adjusts for fill type — this is one of the most commonly missed label requirements.
Crawlspace foundations
Crawlspace applications require trenching along the inside and outside of foundation walls, rodding to ensure the termiticide reaches the full depth of the footing, and treating around interior piers. Vertical barrier rates are typically 4 gallons per 10 linear feet per foot of depth, with rodding holes spaced approximately 12 inches apart in tighter soils. The interior of the crawlspace soil surface also receives a horizontal treatment at the standard fill rate.
Basements and deep footings
Basement construction requires rodding to the full depth of the footing, not just to grade. Backfill soil is treated as it is placed, which means the applicator must be on-site during backfill operations, not after. Waiting until backfill is complete and then trying to rod through compacted soil produces uneven coverage.
Raised porches, entrance slabs, and terraces
These attached structures are frequently undertreated because they are added late in the construction sequence. Each requires its own soil treatment: excavation and treatment of the soil beneath, or drilling and injection where excavation is not feasible. Skipping porch slabs is a common entry point for termites in otherwise well-treated structures.
Application rates sourced from Texas Department of Agriculture guidance and USDA Forest Service technical guidance.
Pro Tip: Require the applicator to rod at every utility penetration and ask for a short video of that rodding. Penetrations are the most likely failure points after the pour, and a 30-second video is the only way to verify they were treated before the slab covers them.
What construction practices must accompany any pretreat?
Chemical and physical barriers do not work in isolation. Extension and regulatory bodies consistently find that neglecting site sanitation and drainage undermines even a correctly applied termiticide barrier.
Builder checklist — enforce before treatment day:
- Remove all cellulose debris: stumps, tree roots, form boards, scrap lumber, and wood stakes must be removed from the entire building footprint and crawlspace area. Do not bury them. Burning surface debris is not enough because underground root systems remain and attract termites directly to the foundation.
- Grade away from the foundation: finish grade should slope away from the building at a minimum of 6 inches over the first 10 feet. Poor drainage concentrates moisture at the foundation, which accelerates termiticide breakdown and attracts subterranean termites.
- Install gutters and downspouts before occupancy: direct roof runoff well away from the foundation perimeter.
- Eliminate wood-to-soil contact: sill plates, door frames, and any structural wood must be separated from soil by concrete or masonry. Use pressure-treated lumber rated for ground contact at all soil interfaces.
- Crawlspace ventilation: install cross-ventilation at a ratio of 1 square foot of vent area per 150 square feet of crawlspace floor area, or install a sealed crawlspace with a vapor barrier and mechanical ventilation.
- Vapor barrier placement: install only after treatment is applied and has had time to absorb. Placing the vapor barrier before treatment is a sequencing error that traps the applicator out of the treated zone.
Pro Tip: Treat the pretreat like a structural inspection. Add it to your construction schedule as a named milestone with a hold point: no vapor barrier placed, no concrete ordered, until the signed service record is in hand.
Coordinating the pretreat with other site-prep activities, including final exterior cleaning and grade verification, keeps the treatment window tight and reduces the risk of soil disturbance between application and pour. Resources on pre-occupancy site coordination can help project managers sequence these final-stage tasks efficiently.
How do you verify pretreat quality and meet regulatory requirements?
The hidden nature of pretreats is the core quality-control problem. Once the slab is poured, there is no way to inspect the work. That makes documentation the only verification tool available to builders, homeowners, and lenders.
What the law requires:
- The applicator must hold a current state structural pest-control license for the jurisdiction where work is performed. Verify this before signing any contract.
- Every application must follow the product label exactly. The label is a federal legal document under FIFRA (the Federal Insecticide, Fungicide, and Rodenticide Act). Deviating from label rates or methods is a federal violation, not just a workmanship issue.
- HUD forms (specifically the Subterranean Termite Protection Builder's Guarantee and the New Construction Subterranean Termite Service Record) are required for FHA and VA-financed construction and must list product name, EPA registration number, gallons applied or bait-station counts, and a certification of label-compliant application.
- State regulatory guides define full versus partial pretreatment, specify application-rate expectations, and require disclosure and documentation wherever partial treatments occur.
What your contract must specify:
- Product name and EPA registration number
- Whether the treatment is full or partial, with a site diagram showing covered areas
- Gallons applied per area and application rates used
- Date(s) of service and number of applicator visits
- Warranty terms: duration, what triggers a warranty inspection, and what retreatment covers
- Applicator's license number and company name
Red flags that signal a poor pretreat: No posted treatment sticker on the structure. Vague scope ("treated foundation area" with no rates or product name). Refusal to provide the product label or EPA registration number. A bid significantly below others with no line-item breakdown. Any verbal-only warranty.
Numbered steps for contract review:
- Request the product label and Safety Data Sheet before signing. Cross-check the label's application rates against what the contract specifies.
- Confirm the applicator will post a treatment sticker on the main electrical panel or a permanent interior wall, not just hand you a paper copy.
- Ask for the tank-mix record or a photo of the product container used on-site. This confirms the dilution rate and product identity.
- Require a signed New Construction Service Record delivered before the concrete pour, not after.
How long does a pre-construction treatment last, and what monitoring follows?
Liquid termiticide barriers are not permanent. Product labels and extension guidance generally describe effective service lives in the range of several years for most registered termiticides under normal conditions, though environmental factors can shorten that window considerably. Soil type, moisture levels, microbial activity, and physical disturbance all affect how quickly a termiticide breaks down in the soil.
What shortens barrier life:
- High-moisture soils and areas with poor drainage accelerate chemical breakdown
- Landscaping changes, irrigation system installation, or plumbing repairs that disturb soil near the foundation
- Heavy rainfall events that saturate and flush treated soil, particularly in the first months after application
- Sandy or highly permeable soils that allow faster leaching
Monitoring schedule recommendations:
- Annual perimeter inspection by a licensed pest-control professional, checking for mud tubes, wood damage, and soil disturbance near the foundation
- Bait station checks every 3–6 months if perimeter stations are part of the protection plan
- Homeowner visual checks after any landscaping work, plumbing repair, or soil disturbance within 10 feet of the foundation
- Reinspection after any addition or renovation that involves breaking the slab or excavating near the foundation
What warranty programs typically cover:
Most applicator warranties cover retreatment if termite activity is found within the treated zone during the warranty period, but they generally do not cover structural repair costs. Read the warranty carefully: some cover the full perimeter, others only the areas specifically treated. The difference between product longevity (what the manufacturer claims) and barrier continuity (whether your specific application remains intact) is real. A barrier that was correctly applied but later disrupted by a plumbing repair is no longer continuous, regardless of what the label says about service life.
What does a pre-construction termite treatment typically cost?
Cost varies more than most builders expect, and the variables that drive it are worth understanding before you solicit bids.
Primary cost drivers:
- Foundation type and perimeter length: crawlspace and basement foundations require more labor-intensive trenching and rodding than slab-on-grade, which increases cost per linear foot
- Treatment scope: full treatment of the entire footprint costs more than a partial treatment, but partial treatments carry documentation and warranty risks that often make full treatment the better value
- Fill type: washed stone under the slab requires a higher application rate (1.5 gal/10 sq ft versus 1 gal/10 sq ft), which increases product volume and cost
- Site access and number of visits: a single-visit application on a clean, accessible site costs less than a multi-visit job with difficult access or a large footprint
- Regional termite pressure: in high-pressure zones (the Southeast, Gulf Coast, and Hawaii), applicators may recommend supplemental methods (borate treatments, perimeter bait stations) that add to the base cost
- Proximity to wells or cisterns: label restrictions near water sources may require alternative products or physical barriers, both of which affect pricing
Ballpark estimates for residential new construction in the United States vary widely by region and site conditions. A straightforward slab-on-grade treatment for a typical single-family home generally runs from a few hundred dollars to over a thousand dollars, with larger footprints, crawlspace foundations, and high-pressure regions at the upper end. Get at least three itemized bids and compare scope, not just price.
| Variable | Lower Cost Scenario | Higher Cost Scenario |
|---|---|---|
| Foundation type | Slab-on-grade, small footprint | Crawlspace or basement, large footprint |
| Fill type | Standard soil fill | Washed stone (higher rate required) |
| Treatment scope | Full treatment, single visit | Partial treatment with multiple visits |
| Supplemental methods | Liquid barrier only | Liquid + borates + bait stations |
| Regional pressure | Low-pressure zone | High-pressure zone (Southeast, Gulf Coast) |
On-site QA checklist before the slab is poured
Because pretreat workmanship is invisible after the pour, builder oversight is the only real quality control. The following steps give you a defensible record.
Numbered on-site verification steps:
- Confirm the applicator's state structural pest-control license number before work begins. Write it on the job file.
- Record the product name, EPA registration number, and dilution rate from the product container on-site, not from the invoice.
- Verify that application rates match the label for your specific fill type (standard fill vs. washed stone).
- Inspect trench locations along all foundation walls, inside and outside, and confirm rodding at all utility penetrations.
- Request a short, time-stamped video of the applicator rodding at pipe penetrations. This is the single most useful piece of documentation you can have.
- Take geotagged photos of treated trenches, the under-slab area, and the treatment sticker posted on the structure.
- Confirm the vapor barrier is placed only after treatment, not before.
- Collect the signed New Construction Service Record before authorizing the concrete pour.
Documentation to keep on file:
- Signed service record with product name, EPA number, gallons applied, date, and applicator signature
- Copy of the product label and Safety Data Sheet
- Geotagged photos and time-stamped video from treatment day
- Copy of any partial-treatment waiver with owner signature and amended site diagram
If a partial treatment is used:
A partial treatment must be documented with a signed owner waiver and an amended site diagram showing exactly which areas were treated and which were not. Unsigned or verbal partials are a legal and warranty liability. Require the waiver in writing before the pour, not after.
Pro Tip: Require the applicator to post the treatment sticker on the main electrical service panel or on a permanent interior wall near the utility entry point. A sticker handed to you as a paper copy gets lost. One bolted to the panel stays with the building for its lifetime.
Is pre-construction termite treatment legally required?
Pre-construction termite treatment is not universally mandated by federal law, but calling it optional overstates the builder's discretion in most situations.
When it is effectively required:
- FHA and VA-financed construction in termite-prone areas: HUD policy requires specific builder guarantee and service-record forms for these programs, and lenders will not close without them in designated termite areas
- Many state building codes and local ordinances in high-pressure regions (Florida, Texas, Louisiana, Georgia, Hawaii, and others) require documented pretreatment as a condition of occupancy or building permit
- Some state structural pest-control regulations require that any pretreat performed must meet specific application-rate and documentation standards, regardless of whether it was voluntarily or mandatorily applied
When partial treatments or waivers are permitted:
Partial treatments are allowed in most jurisdictions when specific areas cannot be treated due to site conditions, but they require documented justification, an owner-signed waiver, and an amended site diagram. The Texas Department of Agriculture's guidance is a useful model: it specifies that partial treatments must be disclosed in writing and that the untreated areas must be identified on a site graph. Most state regulators follow similar logic.
Practical takeaway for builders:
Even where a pretreat is not legally mandated, skipping it in a termite-prone region creates warranty exposure, potential lender complications, and a liability risk if termite damage occurs. Treat it as standard practice and document it accordingly.
How to choose a pretreat applicator: questions and red flags
Selecting the right applicator matters as much as selecting the right product. The work is hidden, the timing is narrow, and a poorly executed pretreat is worse than useless because it creates a false sense of protection.
Questions to ask before hiring:
- What is your current state structural pest-control license number, and can I verify it with the state agency?
- Which product will you use, and can you provide the label and EPA registration number before the job?
- What warranty do you offer, and does it cover the full treatment area or only specific zones?
- Will you provide a signed New Construction Service Record and post a treatment sticker on the structure?
- How do you handle utility penetrations and bath traps specifically?
- What is your policy if the treatment is disrupted by additional grading or rain before the pour?
Contract language to insist on:
- Product name and EPA registration number stated explicitly
- Application rates (gallons per 10 sq ft for horizontal; gallons per 10 linear feet per foot of depth for vertical)
- Total gallons applied and number of applicator visits
- Scope: full treatment or partial, with a site diagram
- Treatment sticker posting confirmed as a deliverable
- Signed service record delivered before concrete pour
- Warranty duration, coverage area, and retreatment terms
Red flags:
- Bid significantly lower than others with no line-item breakdown
- Refusal to name the product or provide the label before signing
- No written warranty or service record offered
- Scope described as "foundation area" with no rates, volumes, or diagram
- Applicator cannot provide a current license number on request
Evaluating bids apples-to-apples:
Compare bids on scope, not price. A bid that covers the full footprint, all penetrations, and includes a warranty is not comparable to one that covers only the perimeter. Build a simple checklist: product named, rates specified, penetrations included, warranty written, service record confirmed. Score each bid against it before looking at the dollar figure.
For ongoing monitoring after construction, structuring a recurring service agreement with clear inspection intervals and defined retreatment triggers is worth the effort. Guidance on structuring recurring maintenance contracts can help you set up the right terms for a long-term monitoring program.
What builders get wrong about pretreats (and how to fix it)
The most expensive pretreat mistakes are not about product selection. They are about sequencing and oversight.
Buried form boards are the single most common source of early termite warranty claims. A crew leaves scrap lumber or a form board under the slab footprint, the pretreat is applied over it, and within a few years the buried wood becomes a termite food source that draws colonies directly to the foundation. Burning surface debris is not a fix: root systems and buried wood remain. The only acceptable standard is complete removal before treatment day.
The second most common failure is missed penetration rodding. An applicator who treats the open soil area correctly but skips rodding at the plumbing stack or electrical conduit leaves a direct termite highway into the structure. Requiring a short video of penetration rodding is not excessive. It is the only way to verify work that will be covered by concrete within hours.
Treating the pretreat like a commodity purchase, rather than an inspected trade, is what allows both of these failures to happen. Plumbing and electrical work get inspections with hold points. Pretreats should too. Require on-site sign-off at final grade, with photo documentation, before the vapor barrier goes down.
Bespoke-Enviro Services: expert termite protection for new construction
When the pretreat window is measured in hours, not days, you need an applicator who shows up prepared, documents everything, and treats the job as a structural milestone rather than a line item.

Bespoke-Enviro Services brings over 30 years of integrated pest management experience to residential, commercial, and construction projects. The team applies eco-friendly, non-toxic termite barriers using IPM strategies that prioritize both structural protection and occupant safety. From site audit through application and post-construction monitoring, Bespoke-Enviro delivers the documentation builders and homeowners need: signed service records, treatment stickers, and label-compliant application rates by foundation type.
If you are managing a new build and need a licensed applicator who can hit the pre-slab window with precision, request a site audit from Bespoke-Enviro Services before your final grade is approved.
Authoritative resources to consult
Reliable, primary-source information on pre-construction termite treatment is available from the following:
- U.S. EPA termite guidance: Termites: How to Identify and Control Them covers approved treatment categories, the importance of licensed professionals, and label compliance requirements
- HUD termite policy and forms: HUD Termite Policy provides the Builder's Guarantee and New Construction Service Record forms required for FHA/VA-financed construction
- USDA Forest Service technical guide: Structural Pre-Construction Subterranean Termite Control details trenching, rodding, and vertical barrier application rates
- Texas Department of Agriculture: Proper Pre-Construction Subterranean Termite Treatments is a model state guide covering full versus partial treatment definitions, rates, and documentation requirements
- NC Department of Agriculture: Structural Pre-Construction Subterranean Termite Control explains continuous barrier requirements and construction-stage scheduling
- University of Arkansas Extension (AG1154): Termite Prevention and Control Methods provides practical application-rate guidance and explains why professional equipment is required
- EPA Pesticide Product Label System (PPLS): search by product name or EPA registration number to retrieve the current label for any registered termiticide
- State pesticide regulatory agencies: your state's department of agriculture or structural pest-control board handles licensing verification and compliance complaints; contact them directly to confirm an applicator's license status before signing a contract
- Building envelope maintenance resources: for post-construction monitoring practices that affect termite risk, including drainage, flashing, and vegetation control, building envelope maintenance guidance offers a useful framework for facility managers and homeowners
Sources
- Termite Prevention and Control Methods - AG1154
- Structural Pre-Construction Subterranean Termite Control - NC Department of Agriculture
- Termites: How to Identify and Control Them | US EPA
- Structural Pre-Construction Subterranean Termite Control (USDA Forest Service misc)
- HUD termite policy / forms