
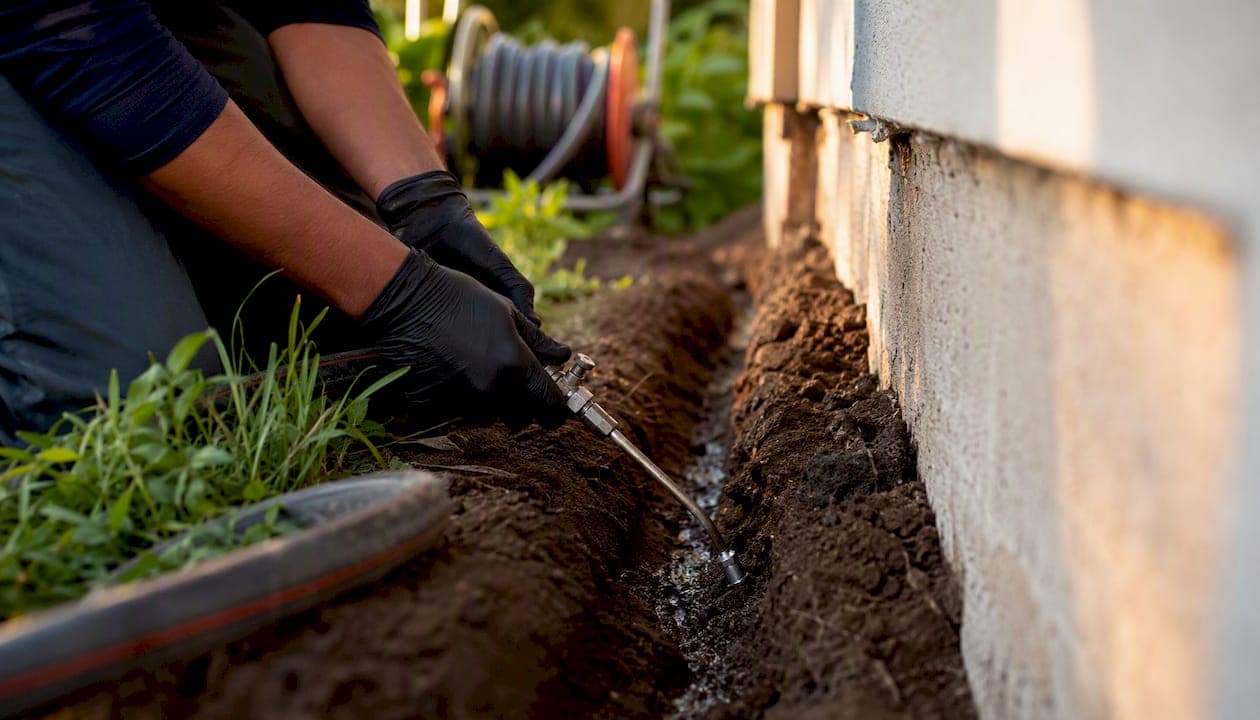
Two methods reliably control termites after a building is already standing: chemical soil barriers (liquid termiticides) applied through trenching, rodding, or drilling, and baiting systems that eliminate colonies through toxic bait exchange. Choose a chemical barrier when the building sits on a slab, when you need protection established quickly, or when a serious infestation is already active. Choose baiting when soil access is limited, when wells or sensitive landscaping rule out large volumes of liquid chemical, or when you'd rather target the whole colony instead of just blocking its path. Many properties, especially ones built with drainage flaws or slab gaps, do best with both.
Your next move is simple: get a licensed pest control professional out for an inspection before you commit to either approach. A good inspection tells you whether you're dealing with subterranean or drywood termites, how far the damage extends, and whether your foundation has the kind of construction flaws that let termites slip past a standard barrier.
Here's what to confirm on that first call:
- Ask whether the technician is a licensed applicator and which termiticide product they plan to use.
- Request a written inspection report, not just a verbal estimate.
- Ask what warranty or monitoring plan comes with the treatment, and what voids it.
Pro Tip: Get at least two inspections before signing anything. A second opinion often reveals whether the first company is recommending a treatment that fits your building or one that's simply easier for them to sell.
Key Takeaways
Effective post-construction termite control depends on matching the method (barrier, bait, or both) to your building's construction and correcting any structural flaws that let termites bypass treatment.
| Point | Details |
|---|---|
| Start with a written inspection | Get a documented inspection report before choosing a treatment, not just a verbal estimate. |
| Match method to construction | Slab homes often need drilling and injection; limited soil access favors baiting systems. |
| Get multiple written quotes | Compare at least two or three itemized proposals with product names and warranty terms. |
| Fix construction flaws first | Correct drainage issues and wood-to-soil contact, since these let termites bypass barriers. |
| Choose Bespoke-enviro for integrated plans | Bespoke-enviro combines inspection-led planning, IPM treatments, and documented warranties for post-construction termite work. |
Table of Contents
- Post Construction Termite Treatment Methods at a Glance
- Chemical Soil Barriers: How Liquid Termiticide Treatment Works
- Baiting and Monitoring Systems: Targeting the Whole Colony
- Localized Wood Treatments and Spot Injections
- When Fumigation or Whole-Structure Treatment Is Necessary
- What a Professional Termite Inspection Actually Covers
- How to Choose the Right Treatment and Vet a Contractor
- What Post-Construction Termite Treatment Typically Costs and How Long It Takes
- Preparing Your Home and Family Before Treatment Day
- Monitoring, Follow-Up, and What Your Warranty Actually Covers
- What an Experienced Technician Actually Checks and Documents
- Do Natural or DIY Termite Remedies Actually Work?
- Our Perspective on Post-Construction Termite Treatment
- Get an Inspection-Led Termite Plan From Bespoke-enviro
- Frequently Asked Questions
- Sources
Post Construction Termite Treatment Methods at a Glance
Four approaches cover almost every post-construction termite scenario, and knowing which one applies to your situation saves you from paying for the wrong service.
- Chemical soil barriers create a continuous treated zone around and under the structure using trenching, rodding, or drilling, depending on what's blocking access.
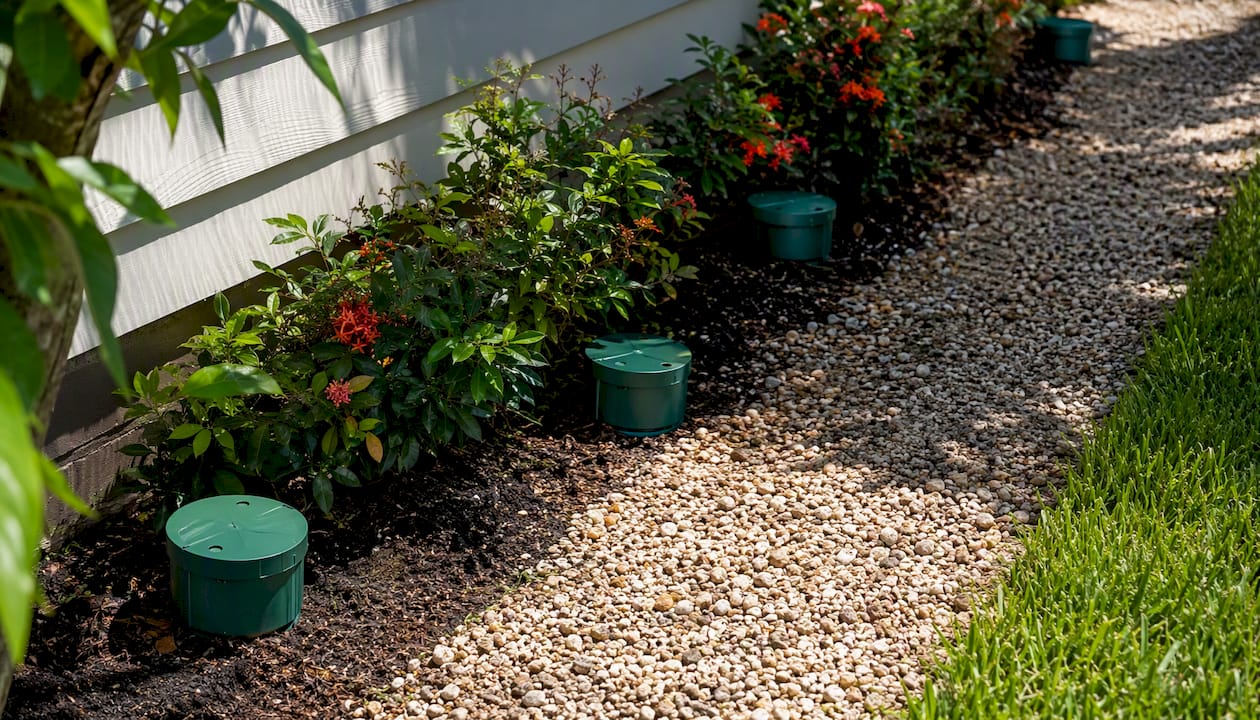
- Baiting and monitoring systems use in-ground stations that termites feed on and carry back to the colony, aiming for elimination rather than just exclusion.
- Localized wood and spot treatments target isolated activity in accessible beams, joists, or furniture without treating the whole perimeter.
- Whole-structure fumigation addresses drywood termite infestations that have spread through the structure itself rather than staying confined to soil-connected wood.
Preventive work and remedial work aren't the same job. A barrier installed before termites arrive is prevention. The same barrier installed after you've found mud tubes on your foundation wall is corrective, and it usually needs to go deeper, wider, or be paired with baiting to catch what the barrier alone might miss. When a house has real construction defects, such as a slab that's pulled away from the foundation or a bath trap with no chemical protection, a single method rarely closes every gap. Combining a soil treatment with monitoring stations is standard practice in those cases, according to guidance from Inspect My Home.
Chemical Soil Barriers: How Liquid Termiticide Treatment Works
A liquid termiticide barrier works by creating a continuous chemical zone in the soil that termites can't cross without contacting it. Non-repellent products let termites walk through undetected, pick up the chemical, and carry it back to the colony, which can suppress activity beyond just the treated line. Repellent products work differently. They simply block entry points, which stops termites from crossing but doesn't do anything to the colony itself.
Three application methods handle different physical barriers on a property:
- Trenching and backfill digs a shallow channel around the foundation perimeter, treats it, and backfills it. This works where there's open soil access.
- Rodding injects termiticide deeper into the soil using a rod, used where paving, a patio, or dense vegetation makes trenching impractical.
- Drilling and injection goes through slabs, driveways, or masonry voids where concrete blocks both trenching and rodding entirely.
Technicians who drill through slabs space holes to adequately cover the area, treating from the bottom of the slab down to the top of the footing as required, according to guidance from North Carolina's Department of Agriculture. Skipping this sub-slab step is one of the most common reasons a "completed" treatment fails within a year. MightyMite Termite notes that trenching, rodding, and drilling each solve a specific access problem rather than being interchangeable techniques, so the right combination depends entirely on what's covering the ground around your foundation.
Liquid barriers have real strengths. They establish protection fast, often within a single service visit, and some non-repellent products carry long residual life underground. The tradeoffs are access and precision. A barrier only works where it's continuous, so a missed section of foundation, an untreated bath trap, or a shrinking slab joint becomes an open door. Misapplied volumes near drains or wells also raise legitimate environmental concerns, which is why label compliance matters as much as the product choice itself.
- Confirm the exact product name and registration number, not just a generic description like "termiticide."
- Ask for the treated linear footage and depth, in writing, not a verbal estimate.
- Get the warranty terms in writing, including what triggers a free retreatment.
Pro Tip: If a contractor can't tell you the product name off the top of their head, that's worth pausing over. A technician who knows their materials will name the product and its label requirements without hesitation.
Baiting and Monitoring Systems: Targeting the Whole Colony
Baiting systems work on a completely different principle than barriers. Instead of blocking termites, in-ground stations placed around the property monitor for activity, and once termites are detected, the monitoring cartridge gets swapped for a toxic bait. Termites share food through a behavior called trophallaxis, so foragers carry the bait back and pass it through the colony, including to termites the technician never saw.
Baiting tends to make the most sense in a few specific situations:
- Properties with limited soil access around the foundation, where trenching or rodding isn't practical.
- Homes near wells, ponds, or sensitive landscaping where lower chemical volume matters.
- Steep or uneven terrain where a continuous liquid barrier is hard to maintain.
- Owners who specifically want colony elimination rather than just exclusion.
The tradeoff is speed. A liquid barrier can establish protection in a day. Bait systems work on the colony's own foraging schedule, and getting from detection to elimination commonly takes weeks to a few months, depending on colony size and how actively termites are feeding at the stations. That's not a flaw in the method. It's the nature of targeting a colony instead of just a perimeter.
- Stations get installed at intervals around the structure, typically every 10 to 20 feet.
- Technicians check stations on a regular schedule, often quarterly, to catch activity early.
- Active stations get switched to bait, then monitored until feeding stops.
- Cartridges return to monitoring mode once activity is confirmed gone.
Station density and inspection frequency are what make or break a bait program. A system checked twice a year on a property with heavy termite pressure is going to underperform one checked quarterly, regardless of which bait product is inside the stations.
Compared to liquid barriers, baiting trades immediate exclusion for a shot at eliminating the colony outright. It also comes with an ongoing service obligation. A barrier, once installed, mostly just sits there until its residual life runs out. A bait system needs consistent monitoring visits to actually do its job.
Localized Wood Treatments and Spot Injections
Not every termite problem needs perimeter-scale treatment. When activity is confined to a single beam, a windowsill, or a section of crawlspace joist, a full soil barrier or bait installation can be overkill, both in cost and disruption.
Spot treatments make sense when the infestation is isolated and the affected wood is accessible. A technician injects liquid termiticide or an expanding foam directly into termite galleries or nearby wall voids, killing the termites present and leaving a residual barrier inside the wood itself. This works well for:
- Isolated joists or beams in a crawlspace with visible galleries.
- A single infested windowsill or door frame.
- Furniture or built-ins with confined, visible damage.
The limitation is reach. Foam and liquid injections only protect what they physically contact, so they can't address a colony operating elsewhere in the structure. If the same house has activity at the foundation line, a spot treatment on one joist does nothing for the rest of the building.
A technician who treats a single infested joist without checking whether the colony has already moved into the slab perimeter is treating a symptom, not the infestation. Isolated damage on inspection day doesn't rule out a broader colony working somewhere the eye can't see.
That's why documentation matters just as much as the injection itself. Before-and-after photos of the treated area, paired with a follow-up inspection a few weeks later, confirm whether the localized treatment actually held or whether activity resurfaced somewhere adjacent.
When Fumigation or Whole-Structure Treatment Is Necessary
Fumigation solves a different problem than soil barriers and baiting. It's built for drywood termites, which live entirely inside wood and never need soil contact, so a subterranean barrier does nothing to reach them. A licensed fumigator seals the structure and introduces a gas fumigant that penetrates every void in the building, killing termites throughout the wood in one pass.
The catch is that fumigation provides zero residual protection. Once the gas dissipates, there's nothing left behind to stop new termites from moving in. That's why fumigation for drywood termites is often paired afterward with preventive measures such as borate wood treatments or ongoing inspection, especially in regions where drywood termites are common.
Fumigation also comes with real logistical weight:
- Occupants, pets, and plants must vacate the property for the full treatment period, typically two to three days including aeration.
- Food, medication, and anything unsealed needs to be removed or bagged per label instructions.
- Neighbors and adjacent units in shared buildings often require advance notice.
- The property needs re-entry clearance from the fumigator before anyone goes back inside.
For severe subterranean infestations, especially where termites have spread extensively through a slab foundation, some providers combine whole-structure chemical injection into the foundation with soil treatment and bait stations as a layered response. This is less common than standard soil barrier work and is generally reserved for cases where a standard barrier has already failed or the infestation is unusually advanced.
- Confirm which termite species is present before agreeing to fumigation. Subterranean termite problems rarely need it.
- Ask what residual protection, if any, follows the fumigation.
- Get the vacate and re-entry timeline in writing before scheduling.
What a Professional Termite Inspection Actually Covers
A real inspection is more than someone walking the perimeter with a flashlight. A thorough technician is looking for specific evidence that tells them exactly where termites are active and how they're getting in.
Core items on a proper inspection checklist include mud tubes on foundation walls, visible wood damage or hollow-sounding beams, cracks in the slab, gaps or voids in the foundation, plumbing penetrations through the slab, drainage problems that keep soil moist near the structure, and any wood-to-ground contact around the exterior, including mulch beds piled against siding.
Inspectors specifically hunt for construction flaws because these are the gaps that let termites bypass an otherwise complete chemical barrier. A slab that's shrunk slightly away from the foundation wall, an untreated bath trap, or a masonry void behind brick veneer can all give termites a path around a barrier that looks perfectly fine from the outside. Relying only on exterior trenching after a house is already built is a common mistake for exactly this reason. Concrete shifts over time, and multiple entry points like plumbing outlets often go untreated in the original construction.
A solid written inspection report should include a site map marking activity and risk areas, photo evidence of any damage or conducive conditions, and a clear breakdown of recommended treatment options with scope and estimated cost, not just a single number.
| Inspection Finding | Typical Treatment Response |
|---|---|
| Mud tubes on exterior foundation wall | Soil barrier via trenching or rodding around the perimeter |
| Slab crack or gap near foundation edge | Sub-slab drilling and injection at the crack location |
| Limited soil access due to paving or landscaping | Baiting stations or rodding in place of trenching |
| Isolated damage in one accessible joist | Localized wood injection with follow-up inspection |
| Multiple construction flaws found across the structure | Combined soil treatment and bait station program |
How to Choose the Right Treatment and Vet a Contractor
Picking between a barrier, baiting, a spot treatment, or a combined approach comes down to a handful of concrete factors specific to your building.
Start with construction type. A slab-on-grade home almost always needs drilling somewhere in the treatment plan, since sub-slab soil can't be reached any other way. A home with a crawlspace or basement gives technicians more direct access, which often keeps costs and disruption lower. From there, factor in the termite species suspected, how far the infestation has spread, your soil type and drainage, whether there's a well or pond nearby that limits chemical volume, and how accessible the perimeter actually is.
Once you know roughly which category your property falls into, vet the contractor with specific questions rather than accepting a generic pitch:
- Are you a licensed applicator, and can I see your license number?
- What termiticide product are you using, and can I see the label?
- What's the treated area, in linear feet and depth, and how does that match the estimate?
- What warranty comes with this treatment, and what specifically voids it?
- How often will you inspect or service the treatment after installation?
- Will I get a written report with photos after each visit?
Watch for red flags that separate a legitimate operator from a rushed sales job:
- A quote that names a vague "termite treatment" without specifying the product.
- No written warranty, or a warranty offered only verbally.
- No inspection report, just an invoice.
- Pressure to pay the full amount upfront before any work is scoped in writing.
If your building checks out with straightforward construction and a contained infestation, a single method, either a barrier or baiting, usually covers it. If the inspection turns up multiple construction flaws, drainage issues, and signs the infestation has been active for a while, an integrated strategy combining soil treatment with monitoring is typically the more durable answer, a point Inspect My Home makes clearly in its comparison of long-term systems.
What Post-Construction Termite Treatment Typically Costs and How Long It Takes
Price and timeline both hinge on the same variables: how hard the property is to access, which method you're using, and how far the infestation has spread. A slab home needing extensive drilling costs more in labor than a crawlspace home where trenching is straightforward. A property with construction flaws that need correcting first, like fixing drainage or removing wood-to-soil contact, adds to both the timeline and the bill.
In Singapore, homeowners can generally expect liquid soil treatments to run from a few hundred to over a thousand Singapore dollars depending on the size of the property and how much drilling is required, while baiting system installation and its first year of monitoring often costs more upfront but spreads the expense across scheduled visits. These figures vary enough by property that getting itemized quotes from two or three licensed operators is the only reliable way to know your actual cost.
| Treatment Stage | Typical Timeframe |
|---|---|
| Inspection and written report turnaround | 1 to 3 days after the site visit |
| Liquid soil barrier application | Usually completed in a single day |
| Baiting system installation | Same day, with active monitoring over weeks to months |
| Cure or monitoring period before follow-up | 30 days, method dependent |
| Standard warranty term | Commonly 1 to 5 years, depending on the provider |
Providers using non-repellent soil injection products often pair the service with multi-year warranties and schedule a check-up visit as that warranty term nears its end, a structure Franz Termite Control describes as standard for its soil injection service. When you're comparing quotes, ask for the same detail level from every contractor: an itemized proposal, the exact product label, a scope map showing what gets treated, and the warranty terms spelled out in writing. A quote that's just a single number with no breakdown makes it impossible to know what you're actually paying for.
- Get at least two written quotes before committing to any treatment.
- Ask whether the warranty includes scheduled monitoring visits or just a promise to retreat if activity returns.
- Factor in the cost of fixing construction flaws separately, since most termite warranties won't cover damage caused by unaddressed drainage or grading issues.
Preparing Your Home and Family Before Treatment Day
Different methods call for different prep work, and getting this wrong can delay your treatment or force a repeat visit.
Fumigation requires the most disruption. Trenching and rodding need a clear perimeter, so move potted plants, outdoor furniture, and anything blocking access to the foundation line a day or two ahead of the appointment. Chemical soil applications near gardens may require temporarily relocating pets and covering vegetable beds, since drift and runoff near edible plants raise different concerns than they do near ornamental landscaping.
Re-entry timing depends entirely on the product label. Most liquid soil treatments are safe to walk near once the product has dried or been watered in per label instructions, often within a few hours, while fumigation requires a formal clearance from the fumigator, typically after two to three days of aeration. Regulatory frameworks around which products are permitted and how they must be applied vary by jurisdiction, and some pesticides carry restrictions or outright bans in certain countries, which is a good reason to confirm your applicator is using a product legally registered for use in your market, as general pesticide regulation records illustrate.
Before signing off on the job, confirm the applicator followed label directions for personal protective equipment and took steps to prevent drift or runoff, especially near storm drains, wells, or garden beds.
Pro Tip: Ask your technician to walk you through the label's re-entry interval before they leave, not after. It only takes a minute, and it means you won't be guessing about when it's safe to let kids or pets back into the yard.
Monitoring, Follow-Up, and What Your Warranty Actually Covers
Treatment doesn't end when the technician packs up. Bait systems need a monitoring schedule, typically quarterly station checks, to catch new activity and confirm the colony has actually been eliminated rather than just gone quiet. Soil barriers usually get a post-treatment inspection at set intervals, often annually, to confirm the barrier is holding and no new entry points have opened up.
Warranties generally cover retreatment if termite activity returns within the barrier's protected zone during the coverage period. They typically exclude damage from new construction changes, landscaping added after the original treatment, or activity traced to a construction flaw the homeowner never had corrected. Read the exclusions section closely. A warranty that sounds comprehensive on the phone can turn out to be narrow once you see it in writing.
- Keep every service report and photo the technician provides, filed together by date.
- Log each bait station inspection, including whether activity was found and what action was taken.
- Document any repairs to drainage, grading, or wood-to-soil contact issues the inspector flagged, since fixing these often keeps a warranty valid.
- If activity returns, contact the provider promptly and reference your original report and warranty terms directly.
Good recordkeeping is also what makes a warranty claim go smoothly. A property manager overseeing multiple buildings especially benefits from tracking maintenance and monitoring schedules systematically, since termite coverage often depends on proving the monitoring visits actually happened on schedule.
- Ask upfront what specifically voids the warranty, not just what it covers.
- Confirm whether monitoring visits are included in the warranty price or billed separately.
- Save copies of every product label used on your property in case a future contractor needs to know what's already in the ground.
What an Experienced Technician Actually Checks and Documents
A technician who knows what they're doing documents far more than the treatment itself. On-site, that means photographing mud tubes at their exact location, noting moisture sources near the foundation, checking foundation voids behind brick veneer, marking every slab penetration point, and tracking utility conduits that pass through the slab, since these are common untreated gaps.
Photo documentation should capture scale, meaning a ruler or reference object in frame, along with clear orientation so a future inspector can find the same spot again, and a timestamp. This isn't paperwork for its own sake. It's what protects you if a warranty claim comes up two years later and you need to prove what the property looked like before and after treatment.
Combination strategies show up constantly in real fieldwork. A property with slab cracks and heavy termite pressure might get targeted sub-slab injection at the crack locations paired with bait stations around the rest of the perimeter, giving both immediate exclusion and longer-term colony suppression.
The invoice should match the report, down to the linear footage treated and the exact locations photographed. If a homeowner can't trace every line item on the bill back to something documented in the report, that's a conversation worth having before final payment.
Pro Tip: Ask to see the technician's photos before they leave the property, not weeks later in an email. A technician confident in their work will show you exactly where they drilled and what they found.
Do Natural or DIY Termite Remedies Actually Work?
Most DIY termite remedies fail for a simple reason: they never reach the colony. Topical sprays, vinegar solutions, and orange oil applied to visible damage might kill the termites they directly touch, but a subterranean colony can hold thousands of individuals living underground, well beyond where a spray bottle reaches. Treating the visible symptom does nothing to the source.
That said, a few low-risk measures genuinely support prevention and are worth doing regardless of whether you also pursue professional treatment:
- Fix drainage issues that keep soil consistently damp against the foundation.
- Remove any wood-to-soil contact around the exterior, including buried scrap wood or firewood stacked against siding.
- Trim vegetation and mulch back from direct contact with foundation walls.
- Repair leaking pipes or spigots that create moisture pockets termites are drawn to.
These steps won't eliminate an active infestation, but they remove the conditions that let one start or spread. A DIY approach can serve as a short-term stopgap if you've spotted early signs and can't get a technician out immediately, but once you've confirmed active termite activity, waiting on DIY measures alone typically lets the colony keep growing while you wait to call a professional.
Our Perspective on Post-Construction Termite Treatment
We've found that the biggest determinant of whether a post-construction treatment holds up isn't the product used. It's whether the inspection that preceded it actually found the construction flaws letting termites in. A barrier applied around a slab that's shrunk away from the foundation, without anyone drilling the gap itself looks complete on paper and fails within a year in practice.
Our approach starts with a thorough inspection, not a sales pitch. We document what we find with photos, map out where the risk areas actually are, and build a tailored plan around your specific construction, whether that means a soil barrier, a bait program, or both. We favor integrated pest management because a single-method fix rarely holds up against a building with real structural gaps, and eco-friendly, non-toxic treatment options let us protect a home without unnecessary chemical load near families and pets. With over 30 years in pest control across residential, commercial, and industrial properties, we've seen enough failed treatments from other providers to know that documentation and follow-up matter just as much as the initial application.
Get an Inspection-Led Termite Plan From Bespoke-enviro
Bespoke-enviro gives you what a rushed one-visit quote can't: a treatment plan built around what your specific property's inspection actually finds, not a generic package sold the same way to every address.

Our technicians document every finding with photos and a written report before recommending anything, then build a plan using integrated pest management and eco-friendly, non-toxic products where they fit your situation, whether that's a soil barrier, a bait program, or both. Every treatment comes with clear warranty terms and a follow-up monitoring schedule, so you're not left guessing whether the job held six months later.
If you're ready to move forward, request a termite inspection and have your property type, any suspected activity, and recent photos of the affected area ready to share. With over 30 years serving residential, commercial, and industrial properties, our certified applicators know how to read a construction flaw before it becomes a warranty dispute.
Frequently Asked Questions
How long does post-construction termite treatment last?
Liquid soil barriers typically carry warranties of one to five years depending on the product and provider, while bait systems require ongoing monitoring rather than a fixed protection window. Ask your provider what triggers a free retreatment before that warranty period ends.
Can I stay in my home during post-construction termite treatment?
For most liquid soil treatments and baiting installations, yes, once you clear the perimeter and follow label re-entry instructions. Fumigation is the exception. It requires full vacancy for the treatment and aeration period, typically two to three days.
What's the difference between termite corrective treatment and preventive treatment?
Corrective, or remedial, treatment addresses an active, confirmed infestation and often needs a more extensive barrier or combined approach. Preventive treatment is applied before termites arrive and can usually rely on a single, standard method.
How do I know if my house needs drilling versus trenching?
If your foundation perimeter has open soil access, trenching usually works. If a slab, patio, driveway, or other concrete surface blocks that access, drilling and injection through the concrete becomes necessary to reach the sub-slab soil.
Does baiting eliminate the termite colony completely?
Baiting aims for colony elimination through shared feeding among termites, and many programs succeed at suppressing or eliminating detected colonies, but confirmation requires consistent monitoring over weeks to months rather than immediate visual proof.
Sources
The guidance in this article draws on structural pest control standards and field-level termite treatment resources, including North Carolina's Department of Agriculture guidance on post-construction subterranean termite control, MightyMite Termite's comparison of rodding and drilling techniques, and Inspect My Home's analysis of barrier versus baiting effectiveness.
Product-specific detail on soil injection warranties came from Franz Termite Control's soil injection treatment page, and drilling and injection technique background came from TheConstructor's guide to anti-termite treatment types.
Always check the current product label and confirm your applicator's license with the appropriate local licensing body before finalizing any treatment plan, since regulations and approved products can vary by jurisdiction.
- Structural Post-Construction Subterranean Termite Control | NC Agriculture
- Compare Rodding and Drilling for Termite Control | MightyMite Termite
- Which termite treatment is the most effective? | Inspect My Home
- Soil Injection Termite Treatment | Franz Termite Control